An Introduction to ChimeraX User Interface
Welcome to our blog post on ChimeraX User Interface. ChimeraX is a powerful molecular visualization and analysis software widely used by researchers in the field of structural biology. In this post, we’ll explore the key features and components of the ChimeraX user interface, helping you get started with this versatile tool for visualizing and analyzing molecular structures.
Learning Objectives
At the end of this lesson, you should be able to:
- Identify different components of the ChimeraX user interface
- Customize the ChimeraX user interface
- Load a downloaded molecular structure into the ChimeraX interface
- Apply various mouse actions to rotate, translate, and zoom molecules
1. Main Components of the ChimeraX User Interface
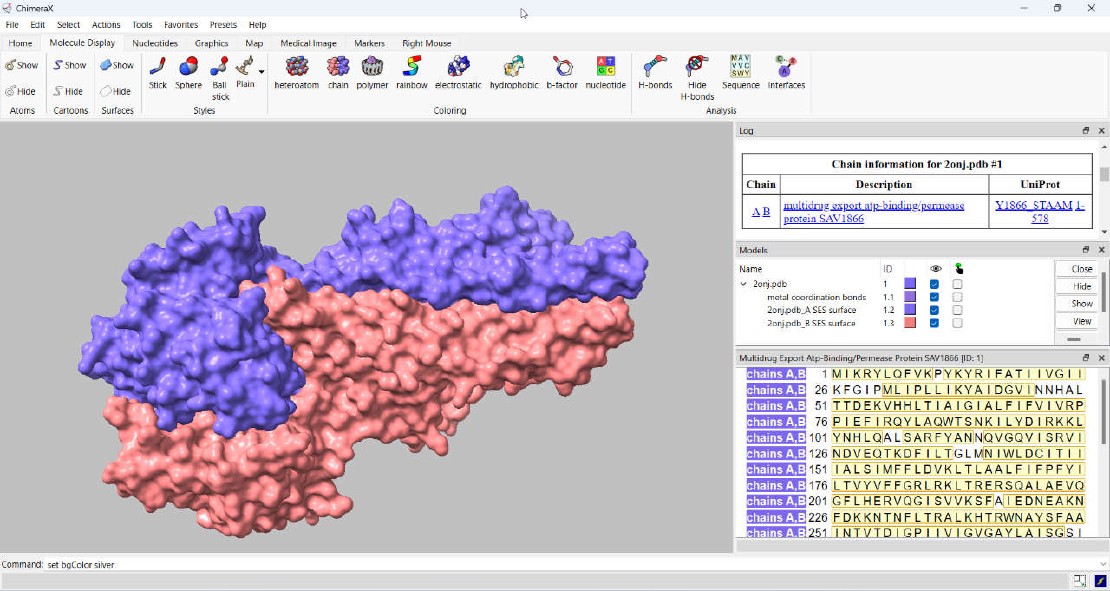
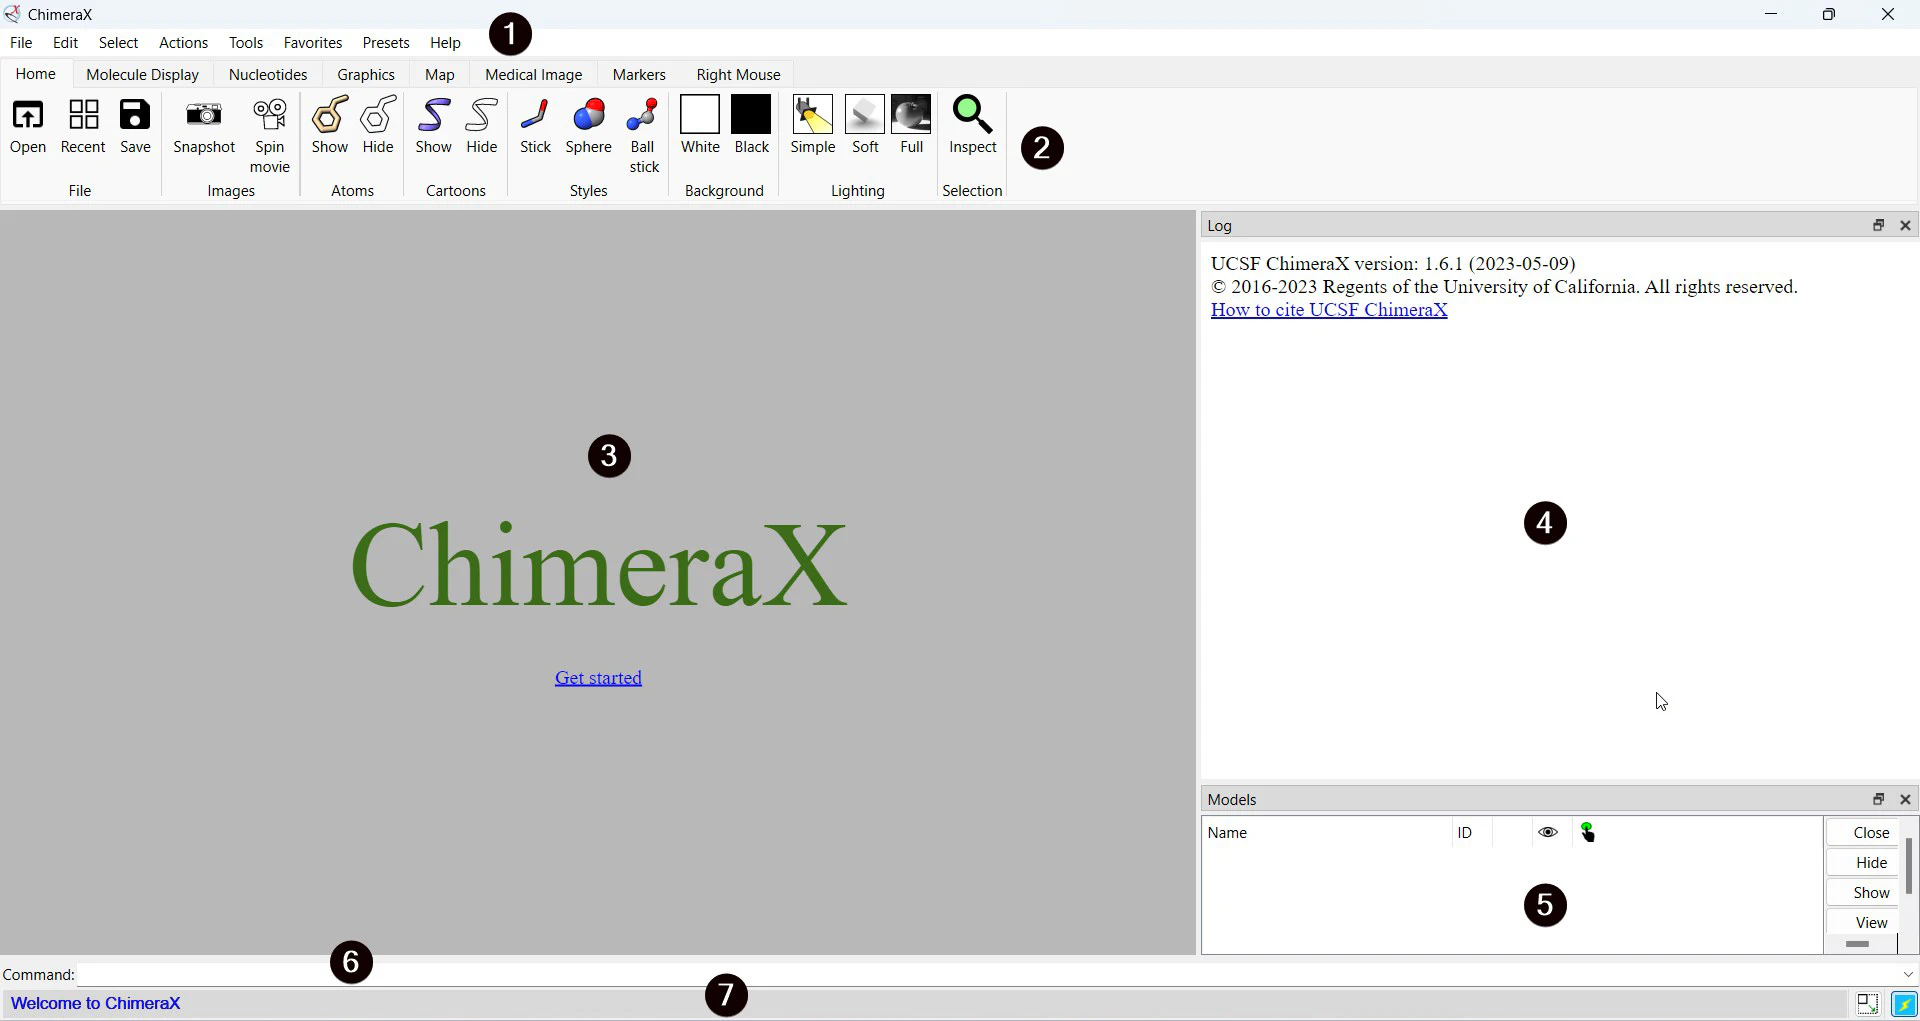
ChimeraX features a user interface (UI) that comprises several components, including a menubar, a main graphical window, a status bar, and customizable tool panels that can be shown or hidden as needed. By default, the UI of ChimeraX consists of seven components.
| Label | Component | Purpose | Features |
|---|---|---|---|
| 1 | Menu bar | A way to interact with the program via drop-down menus | Appears at the top of the UI. Can not be hidden, rearranged, or detached. |
| 2 | Graphical toolbar | A tabbed ribbon-like interface with graphical buttons for more frequent interactions with the program. | Located just below the menu bar in the default layout. Can be hidden, rearranged, or detached. |
| 3 | Graphical window | An interactive canvas for visualizing 3D structures of molecules. | Appears in the middle of the UI, just below the graphical toolbar. Can not be hidden, rearranged, or detached. |
| 4 | Log panel | Displays logging information including executed actions, results, and other messages. | Located at the top right, just below the graphical toolbar. Can be hidden, rearranged, or detached. |
| 5 | Model panel | Shows the hierarchy of open models. Three-dimensional (3D) atomic structures, volume datasets, surfaces, and other objects are considered models. | Appears just below the log panel in the default layout. Can be hidden, rearranged, or detached. |
| 6 | Command line interface | A command panel to interact with the program. | Located at the bottom of the UI, just above the status bar. Can be hidden, rearranged, or detached. |
| 7 | Status bar | Shows transient messages related to the program’s current state and background operations. | Occupies the bottom part of the UI. Can not be hidden, rearranged, or detached. |
2. ChimeraX User Interface Customizations
ChimeraX UI can be customized to contain 3 or more components in various configurations. Except for the menu bar, graphical window, and status bar, all other panels can be hidden, detached, or repositioned into different areas of the screen. Besides the panels in the default layout, several other panels can be accessed through the ‘Tools’ menu. The screen real estate can be saved by stacking panels to form a tabbed user interface.
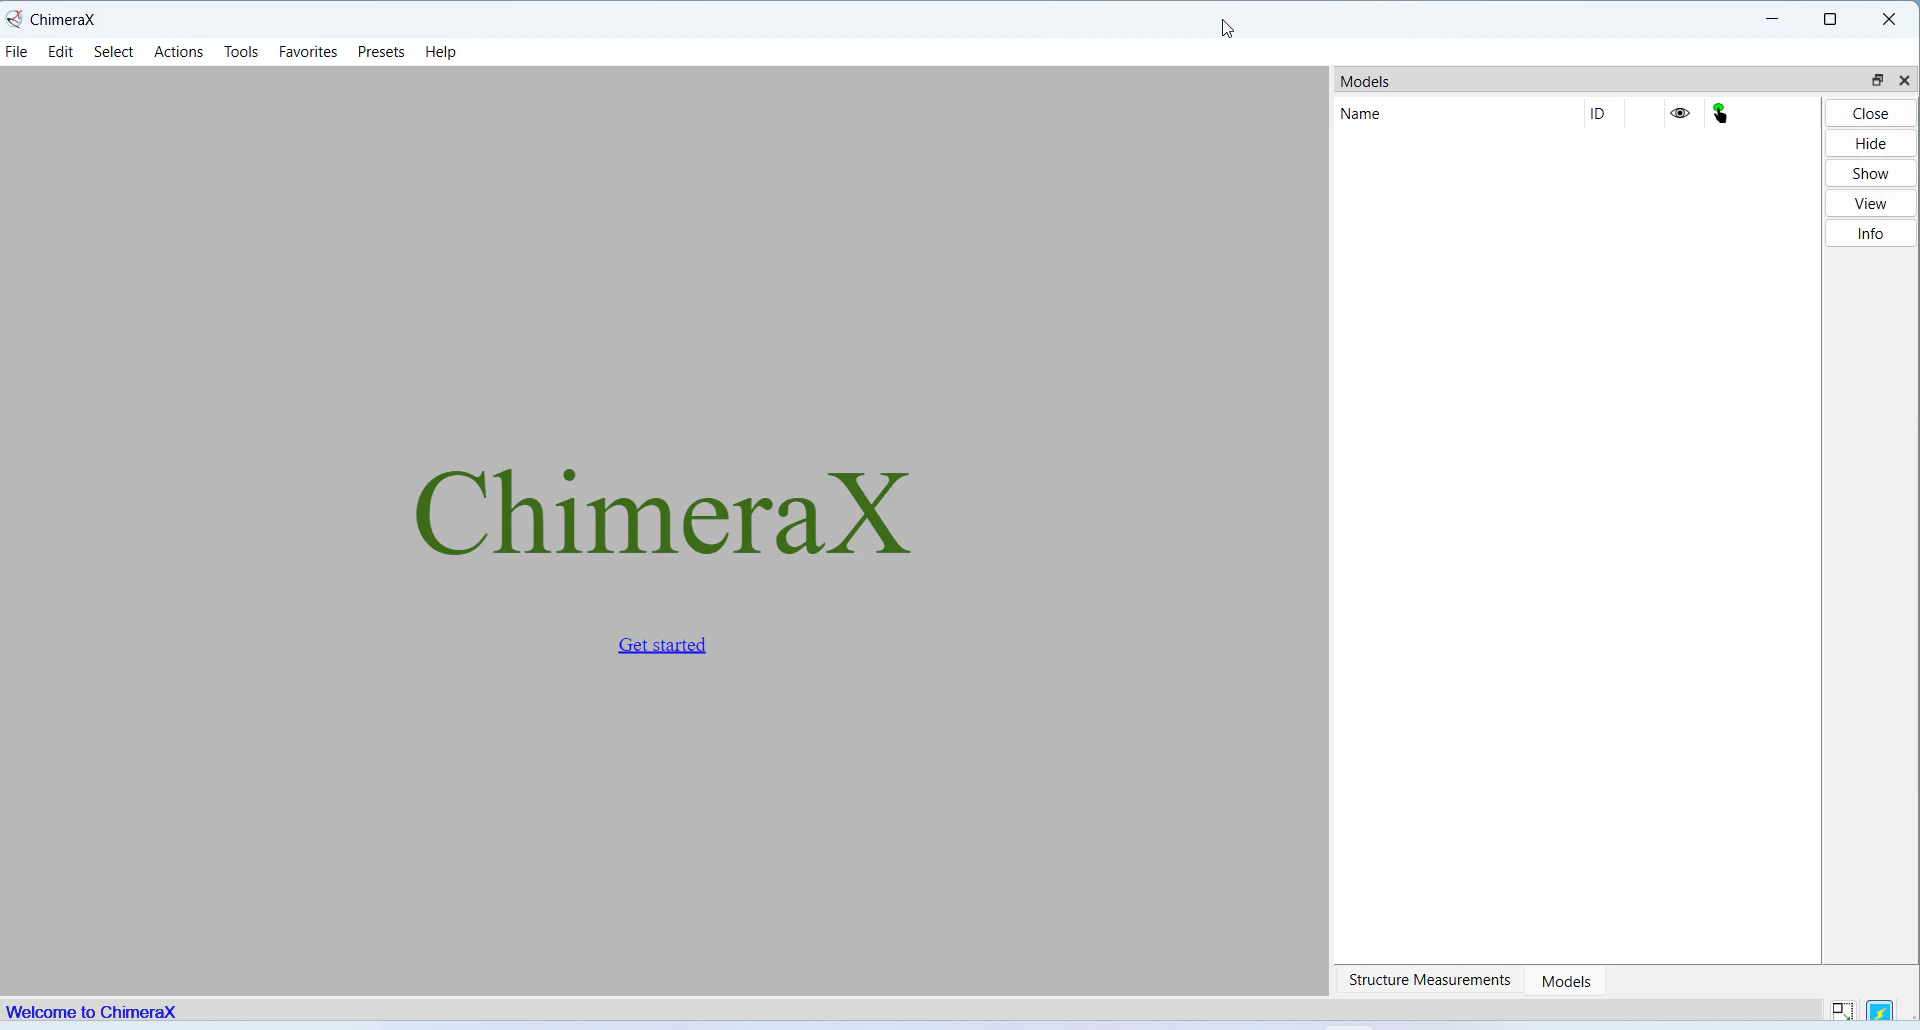
You can hide or display the four detachable panels that are initially visible in the default user interface (UI) by accessing the ‘Tools’ menu. Additionally, you have the option to hide the log panel and model panel by simply clicking the close button located on the title bar of each respective panel.
While the command line interface and graphical toolbar lack a visible close button in their default form, the option to close them is still available when these panels are detached. To detach a panel, simply right-click on it and choose the ‘Undock’ option from the context menu. This action separates the panel from its original position and allows you to access the close button, enabling you to close the panel when needed.
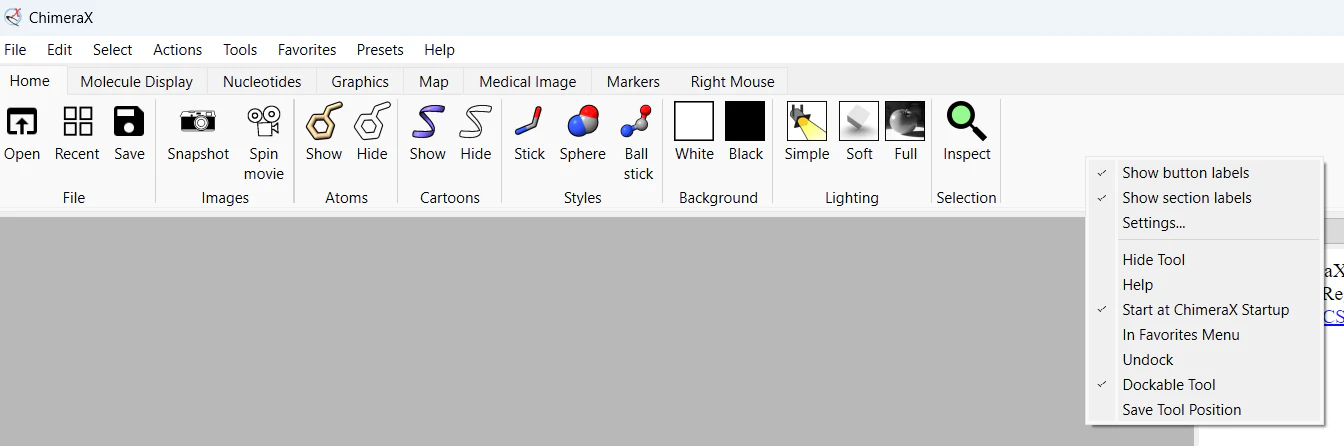
Customization options are available for certain components of the graphical toolbar as well. Specifically, the ‘Home’ tab of the graphical toolbar can be personalized by adding or removing buttons according to your preferences. Furthermore, you can group these buttons into sub-sections that are defined by the user. This allows for a tailored experience where you can arrange the toolbar to include the specific functions and shortcuts that are most relevant to your workflow.

The ‘Right Mouse’ tab on the graphical toolbar manages the functionality of the right mouse button. By default, it is configured to move the 3D model horizontally and vertically (xy plane). However, you have the option to customize it to perform different actions like selecting, zooming, rotating, and more by adjusting the settings in the ‘Right Mouse’ tab.
3. Loading a Downloaded Molecular Structure Into ChimeraX
To open a downloaded molecular structure in ChimeraX, you have a few options. One way is to go to the ‘File’ menu and choose the ‘Open’ option. Another way is to click the ‘Open’ button on the graphical toolbar. Both actions will bring up a file browser dialog box. From there, you can navigate through your computer’s directories to find the downloaded molecular structure file. Once you’ve located the file, simply select it and click the ‘Open’ button in the file browser window.
Alternatively, you can drag and drop the downloaded file directly into the graphical window of the ChimeraX user interface. This method allows for a quick and convenient way to load the molecular structure without going through the ‘File’ menu.
4. ChimeraX Mouse Actions
The 3D models on ChimeraX’s graphical window can be manipulated by various mouse actions.
When the left mouse button is clicked and dragged outside the model display area, it initiates rotation of the 3D model specifically on the xy plane. Clicking and dragging the left mouse button inside the model display area rotates the model in all three directions.
To zoom the 3D model in and out, the mouse scroll wheel can be rotated.
Moving the model within the xy plane can be achieved by clicking and dragging the middle mouse button or mouse wheel.
By default, the right mouse button is associated with moving the model in the xy plane. However, this behavior can be customized through the settings found in the ‘Right Mouse’ tab.
5. Final Thoughts
In conclusion, mastering the ChimeraX user interface opens doors to efficient molecular visualization and analysis in structural biology. Identifying and customizing the components, loading molecular structures, and understanding mouse actions are key skills. The UI’s flexibility allows for personalized configurations, optimizing workflow and saving screen space.
Whether utilizing default settings or tailoring the interface to specific needs, ChimeraX empowers researchers to delve into the intricate world of molecular structures. With seamless navigation through menus, graphical elements, and mouse actions, ChimeraX stands as a versatile tool for scientists navigating the complex terrain of structural biology. Explore, customize, and elevate your molecular exploration with ChimeraX.
Related Posts
An Introduction to Molecular Graphics
Explore the captivating world of molecular graphics, where science meets art to unravel the secrets of molecules. From the early days of wooden models to the digital age, this journey delves into the history, diverse visualization techniques, and the intricate representations of atoms, proteins, surfaces, and nucleic acids.
Read more
ChimeraX Matchmaker
Dive into the world of “Matchmaker”, an essential ChimeraX extension for protein structure-function research. This blog post unveils its intricacies, guiding you through both its fundamentals and advanced features.
Read more
Navigating PDB: Legacy Format to PDBx/mmCIF
Discover the fascinating journey of protein data storage since 1971. From the legacy PDB format, designed for punched cards, to the modern PDBx/mmCIF format, built to accommodate complex macromolecular data.
Read more